All right, the last step to complete the great Sourdough Monitoring Project (SMP): capturing actual footage. We don't need a real video but just a sequence of still images. The goal is to collect enough of those on disk to later be able to assemble them into a time-laps video of the dough growing.
First I'll show you how to enable camera support in software, then how to attach the camera, and finally finally how to capture images to disk. As a bonus, I'll share a PHP script you can use to receive images on a server on the internet so you can look at your dough from the other side of the world.
# Enabling the Camera Support in Software
Execute 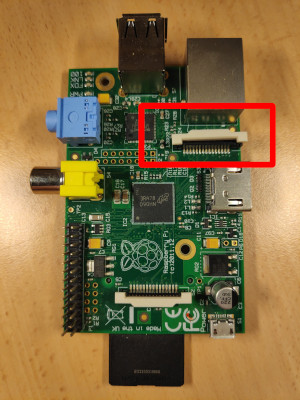
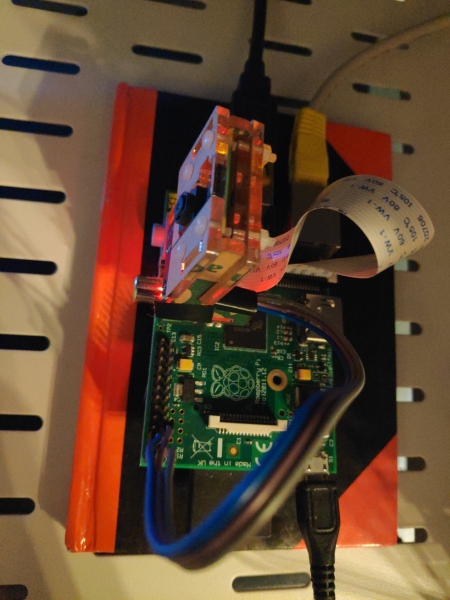
Now don't be like me and try to jam in the cable as hard as you can but instead notice that you can pull up those white nobs there. After pulling them up, the cable glides in like a swan. Now, unlike me, make sure to _really_ put the cable in, all the way! And finally, press down those white nobs again.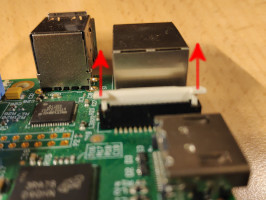
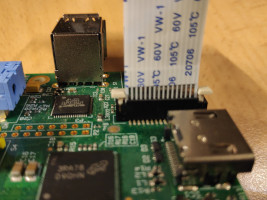
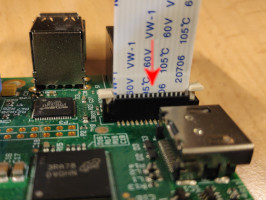
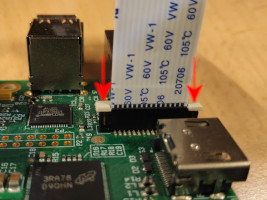
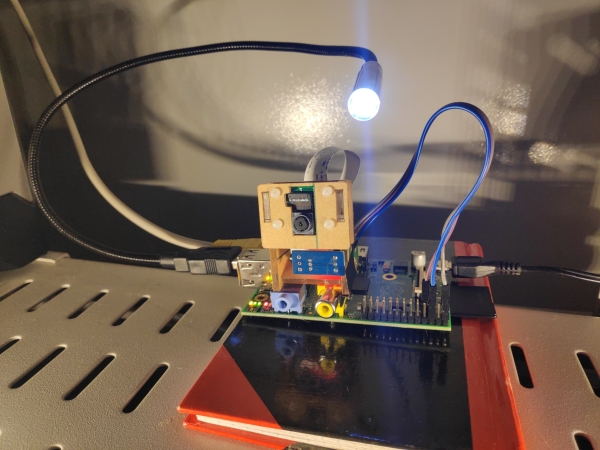
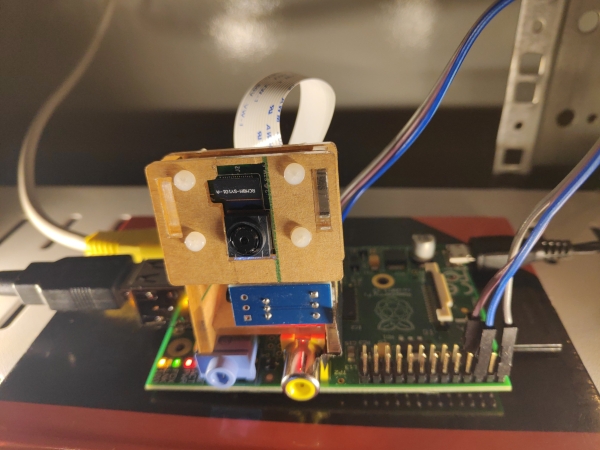
Also, make sure to put the cable in with the silver metal connectors facing the direction of the circuit path visible on the board. The photos above show the correct way for a Model 1 B 2.0. Boot up your Pi and hope for the following output: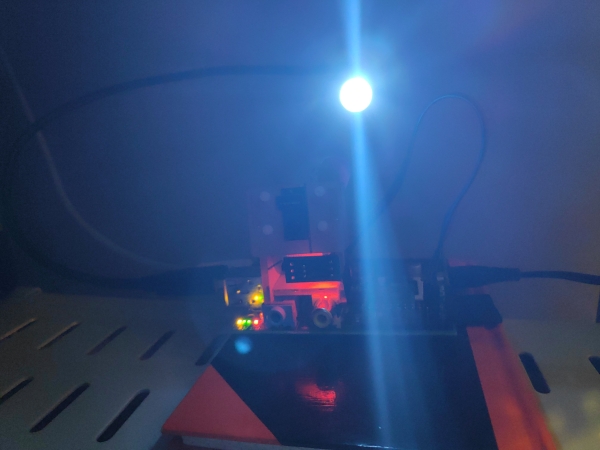
raspi-config and select "Interface Options", then "Camera", and finally answer the question if you want to enable the camera interface with "Yes". You can now use the vcgencmd program to confirm this worked:
$ vcgencmd get_camera
supported=1 detected=0
0 after detected into a pleasant 1.
# Attaching the Camera
First, identify the camera port on your Raspberry Pi. Some googling around for data sheets should do the trick. For both my Model 1 B 2.0 (CPU Revision 000e) and my Model 2 B 1.1, it was perpendicular to the edge of the HDMI port directly next to it:

Now don't be like me and try to jam in the cable as hard as you can but instead notice that you can pull up those white nobs there. After pulling them up, the cable glides in like a swan. Now, unlike me, make sure to _really_ put the cable in, all the way! And finally, press down those white nobs again.


Also, make sure to put the cable in with the silver metal connectors facing the direction of the circuit path visible on the board. The photos above show the correct way for a Model 1 B 2.0. Boot up your Pi and hope for the following output:
$ vcgencmd get_camera
supported=1 detected=1
raspistill. It supports all kinds of options like rotation, scaling and more fancy filters. But for now, we will just use the -o switch to set the file name:
raspistill -o image.png
curl to do all the heavy network-related lifting:
#!/bin/bash
set -e
cd /home/pi

IMAGE="image.png"
TEMPERATURE=$(python3 temperature.py)
raspistill -o "$IMAGE" -q 100 -n -w 532 -h 400 -rot 0
curl -F "upload=@$IMAGE" "https://example.com/upload.php?temperature=$TEMPERATURE"
upload.php that can be used with the above curl command to write the captured image to a directory called data and log the measured temperature together with the timestamp to a file called temperature.log. It will also generate a static HTML page that you can then browse to.
<?php
function error_out()
{
    header('HTTP/1.1 500 Internal Server Error');
    exit();
}

if ( !isset($_FILES['upload']) || !isset($_FILES['upload']['error']) || $_FILES['upload']['error'] !== 0) error_out();
$image_file = 'data/img-' . ( (new Datetime())->format('YmdHis')) . '.jpg';
if ( !@move_uploaded_file($_FILES['upload']['tmp_name'], $image_file)) error_out();

$timestamp = (new Datetime())->format('Y-m-d H:i:s');
$temperature = isset($_GET['temperature']) ? $_GET['temperature'] + 0 : null;
if ($temperature) {
    $fp = fopen('temperatures.log', 'a');
    if ( !$fp) error_out();
    fwrite($fp, $timestamp . ': ' . $temperature . "\n");
    fclose($fp);
    $temperature_out = number_format($temperature / 1000., 1) . '°C';
} else {
    $temperature_out = '<i>unknown</i>';
}

$content = <<<EOF
<html>
  <head>
    <title>Sauercam</title>
    <style type="text/css">
        body {
            background: black;
            color: white;
        }
    </style>
  </head>
  <body>
    <h1>Sauercam</h1>
    <h3>{{ now }}</h3>
    <p>Temperature: {{ temperature }}</p>
    <img decoding="async" src="{{ image_file }}" />
  </body>
</html>
EOF;
$content = str_replace('{{ image_file }}', $image_file, $content);
$content = str_replace('{{ temperature }}', $temperature_out, $content);
$content = str_replace('{{ now }}', $timestamp, $content);
$fp = fopen('index.html', 'w');
if ( !$fp) {
    error_out();
}
fputs($fp, $content);
fclose($fp);


