**Disclaimer:** If you are not running Windows on your host, you might not get anything out of this post. Sorry Tux.
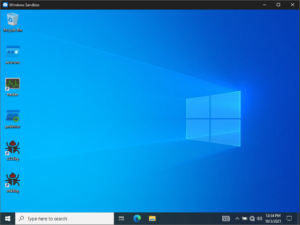
I am convinced that the Windows Sandbox is one of the best virtualization solutions to do dynamic malware analysis (for Windows malware, at least). The reason is quite simple: Distinguishing a Windows 10 Sandbox instance from the actual underlying Windows 10 install should be very difficult for malware. Specifically if the host is running on HyperV with Guarded Host enabled, my current understanding is that there are little to no differences between the two, but they are neatly isolated from one another. The configuration options are limited, but you can easily cook up a config that launches a WindowsSandbox instance that has all the tools you need for some basic unpacking & dynamic analysis. This is what my malware analysis sandbox looks like at launch:
 I have successfully executed a number of samples that evade execution in other virtualized environments. That's a far cry from rigorous testing, so take my praise with a grain of salt. Still, it might be worth a try, the setup is really easy.
### My Config
The [Windows Sandbox documentation][WSDOCS] should have everything you need for installation, that bit is fairly straightforward. What the documentation doesn't have is a ready-to-go, copy & paste example configuration. So here it is:
<Configuration>
    <AudioInput>Disable</AudioInput>
    <ClipboardRedirection>Disable</ClipboardRedirection>
    <MemoryInMB>4096</MemoryInMB>
    <Networking>Disable</Networking>
    <PrinterRedirection>Disable</PrinterRedirection>
    <ProtectedClient>Enable</ProtectedClient>
    <vGPU>Enable</vGPU>
    <VideoInput>Disable</VideoInput>
    <LogonCommand>
        <Command>powershell.exe -ep unrestricted c:\\tooling\\newsandbox.ps1</Command>
    </LogonCommand>
    <MappedFolders>
        <MappedFolder>
            <HostFolder>w:\vmshare\tooling</HostFolder>
            <SandboxFolder>c:\tooling</SandboxFolder>
            <ReadOnly>true</ReadOnly>
        </MappedFolder>
        <MappedFolder>
            <HostFolder>w:\vmshare\airlock</HostFolder>
            <SandboxFolder>c:\airlock</SandboxFolder>
            <ReadOnly>false</ReadOnly>
        </MappedFolder>
    </MappedFolders>
</Configuration>
malware-analysis.wsb and that's it. The .wsb file type should be associated with the Windows Sandbox executable, so shell-executing the file (read: double-clicking it) should launch a new Windows Sandbox instance with that configuration.
Most of the settings are fairly obvious. This configuration is my offline analysis sandbox which has no internet connection. I give the VM a decent amount of memory to avoid being detected based on poor hardware specs. All other settings are configured to lock down the sandbox instance as tightly as possible. I use two shared folders:
- w:\vmshare\tooling contains [ProcessHacker][], [SysInternals][], and [x64dbg][] with [OllyDumpEx][] and [ScyllaHide][] plugins installed.
- w:\vmshare\airlock is the location where the malware goes into the sandbox, and dumps come out.
You can have the Windows Sandbox execute a brief setup script during startup. My script is the following:
[CmdletBinding(PositionalBinding=$false)]
Param(
    [Parameter(Mandatory=$false)]
    [string] $Src = "c:\tooling"
)
Set-ExecutionPolicy Unrestricted -Scope LocalMachine

$wsh = New-Object -comObject WScript.Shell

$shortcuts = @(
    @("x32dbg", "$Src\x64dbg\release\x32\x32dbg.exe"),
    @("x64dbg", "$Src\x64dbg\release\x64\x64dbg.exe"),
    @("hacker", "$Src\ProcessHacker\64bit\ProcessHacker.exe")
)
$copyfile = @(
    @("pm0nitor.exe", "$Src\SysinternalsSuite\Procmon64.exe"),
    @("autoruns.exe", "$Src\SysinternalsSuite\autoruns64.exe")
)

$copyfile | ForEach-Object {
    $dst = Join-Path "$Home\Desktop" $_[0]
    Copy-Item $_[1] $dst
}
$shortcuts | ForEach-Object {
    $dst = $_[0]
    $sc = $wsh.CreateShortcut("$Home\Desktop\$dst.lnk")
    $sc.TargetPath = $_[1]
    $sc.Save()
}
One Reply to “Using Windows Sandbox for Malware Analysis”